- 2025-09-05
- posted by Thuta Yar Moe
- System
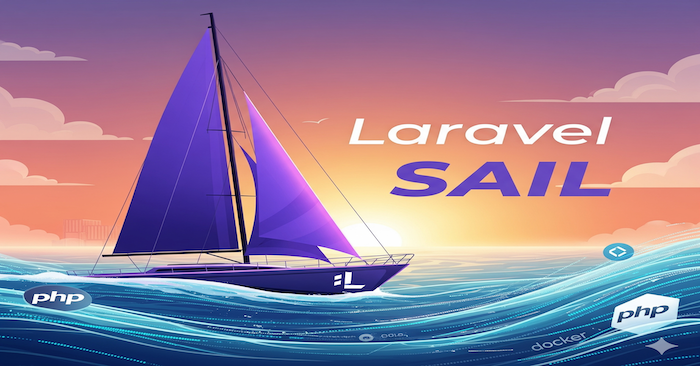
Laravel Sail: The Ultimate Guide to Docker-Based Laravel Development
Laravel development has never been easier thanks to Laravel Sail, a lightweight command-line interface that provides a simple way to interact with Laravel's default Docker development environment. Whether you're a seasoned developer or just starting your Laravel journey, Sail eliminates the complexity of setting up a development environment while providing all the power and consistency of Docker.
What is Laravel Sail?
Laravel Sail is a Docker-based development environment that comes bundled with Laravel. It's essentially a wrapper around Docker Compose that provides a pre-configured development stack including:
- **PHP** (multiple versions available)
- **MySQL/PostgreSQL** databases
- **Redis** for caching and queues
- **Mailhog** for email testing
- **Selenium** for browser testing
- **Node.js** for frontend asset compilation
Think of Sail as your development environment in a box—everything you need to build modern Laravel applications, containerized and ready to go.
Why Choose Laravel Sail?
🚀 Zero Configuration Required
Unlike traditional development setups that require installing and configuring multiple services on your local machine, Sail works out of the box. No more spending hours setting up PHP, MySQL, Redis, and other services.
🔄 Consistent Across All Environments
Every team member gets the exact same development environment, regardless of their operating system. This eliminates the infamous "it works on my machine" problem.
🐳 Docker Without the Complexity
You get all the benefits of Docker containerization without needing to understand Docker internals. Sail abstracts away the complexity while keeping the power.
🔧 Easily Customizable
When you do need to customize your environment, Sail makes it straightforward to modify configurations and add new services.
🧪 Perfect for Testing
With built-in Selenium support and isolated environments, testing becomes much more reliable and predictable.
Getting Started
System Requirements
- Docker Desktop (Windows/macOS) or Docker Engine (Linux)
- Git
- A terminal/command prompt
Quick Start for New Projects
The fastest way to get started with a new Laravel project using Sail:
```bash
# Create a new Laravel project with Sail
curl -s "https://laravel.build/my-awesome-app" | bash

# Navigate to your project
cd my-awesome-app

# Start the development environment
./vendor/bin/sail up
```
Your Laravel application will be available at `http://localhost` once the containers are running.
Installation Methods
Method 1: New Project with Sail
For brand new projects, use the Laravel installer with Sail:
```bash
# Using the Laravel installer
curl -s "https://laravel.build/project-name" | bash

# With specific services
curl -s "https://laravel.build/project-name?with=mysql,redis,mailhog" | bash

# With specific PHP version
curl -s "https://laravel.build/project-name?php=81" | bash
```
Method 2: Adding Sail to Existing Projects
For existing Laravel projects:
```bash
# Install Sail as a development dependency
composer require laravel/sail --dev

# Publish Sail's docker-compose.yml
php artisan sail:install

# Choose your services (MySQL, PostgreSQL, Redis, etc.)
# Start your environment
./vendor/bin/sail up
```
Method 3: Global Installation
Install Sail globally for easier project creation:
```bash
# Install globally via Composer
composer global require laravel/installer

# Create new project with Sail
laravel new project-name --sail
```
Essential Commands
Creating a Convenient Alias
First, create an alias to make commands shorter:
```bash
# Add to your shell profile (.zshrc, .bashrc, etc.)
alias sail='[ -f sail ] && bash sail || bash vendor/bin/sail'

# Or use this one-liner to create the alias
echo "alias sail='[ -f sail ] && bash sail || bash vendor/bin/sail'" >> ~/.zshrc
source ~/.zshrc
```
Container Management
```bash
# Start all services
sail up

# Start in detached mode (background)
sail up -d

# Stop all services
sail down

# Restart services
sail restart

# View running containers
sail ps

# View logs
sail logs
sail logs mysql  # Specific service logs
```
Laravel Artisan Commands
```bash
# Run any Artisan command
sail artisan migrate
sail artisan make:controller UserController
sail artisan make:model Post -mcr
sail artisan tinker
sail artisan queue:work

# Database operations
sail artisan migrate:fresh --seed
sail artisan db:seed
```
Package Management
```bash
# Composer commands
sail composer install
sail composer require spatie/laravel-permission
sail composer update

# NPM/Node commands
sail npm install
sail npm run dev
sail npm run build
sail yarn install  # If you prefer Yarn
```
Testing
```bash
# Run PHPUnit tests
sail test

# Run specific test file
sail test tests/Feature/UserTest.php

# Run tests with coverage
sail test --coverage

# Run Dusk browser tests
sail dusk
```
Database Management
```bash
# Access MySQL shell
sail mysql

# Access PostgreSQL shell (if using PostgreSQL)
sail psql

# Import database dump
sail mysql < database_dump.sql

# Create database backup
sail exec mysql mysqldump -u sail -p'password' laravel > backup.sql
```
Configuration and Customization
Environment Configuration
Your `.env` file controls many aspects of your Sail environment:
```env
# Application settings
APP_NAME="My Awesome App"
APP_ENV=local
APP_KEY=base64:your-app-key
APP_DEBUG=true
APP_URL=http://localhost

# Database configuration
DB_CONNECTION=mysql
DB_HOST=mysql
DB_PORT=3306
DB_DATABASE=laravel
DB_USERNAME=sail
DB_PASSWORD=password

# Sail-specific settings
SAIL_PHP_VERSION=8.2
APP_PORT=80
FORWARD_DB_PORT=3306
FORWARD_REDIS_PORT=6379
FORWARD_MAILHOG_PORT=1025
FORWARD_MAILHOG_DASHBOARD_PORT=8025

# Services to include
SAIL_SERVICES=mysql,redis,mailhog,selenium
```
Customizing Services
Changing PHP Version
```env
# In your .env file
SAIL_PHP_VERSION=8.1  # or 8.0, 8.2, 8.3
```
Then rebuild your containers:
```bash
sail build --no-cache
sail up
```
Adding or Removing Services
```bash
# Reinstall Sail with different services
sail artisan sail:install

# Or manually edit docker-compose.yml
# Available services: mysql, pgsql, mariadb, redis, memcached, mailhog, selenium, soketi
```
Custom Port Configuration
```env
# Change application port
APP_PORT=8080

# Change database port
FORWARD_DB_PORT=3307

# Change Redis port
FORWARD_REDIS_PORT=6380
```
Publishing Docker Configuration
For advanced customization, publish the Docker files:
```bash
sail artisan sail:publish
```
This creates a `docker` directory with Dockerfiles you can modify:
```
docker/
├── 8.2/
│   ├── Dockerfile
│   └── supervisord.conf
├── 8.1/
│   ├── Dockerfile
│   └── supervisord.conf
└── ...
```
Working with Services
MySQL Database
```bash
# Access MySQL shell
sail mysql

# Connect with specific database
sail mysql laravel

# Run SQL file
sail mysql < setup.sql

# Create database dump
sail exec mysql mysqldump -u sail -p'password' laravel > backup.sql
```
Redis
```bash
# Access Redis CLI
sail redis

# Monitor Redis commands
sail redis monitor

# Get Redis info
sail redis info
```
Mailhog (Email Testing)
Mailhog catches all emails sent by your application during development:
- Access the dashboard at `http://localhost:8025`
- All emails are intercepted and displayed in the web interface
- Perfect for testing email functionality without sending real emails
```php
// In your Laravel application
Mail::to('user@example.com')->send(new WelcomeMail());
// Check http://localhost:8025 to see the email
```
Selenium (Browser Testing)
```bash
# Run Dusk tests
sail dusk

# Run specific Dusk test
sail dusk tests/Browser/LoginTest.php

# Access VNC viewer (if configured)
# Default: vnc://localhost:5900
```
Future of Laravel Sail
Laravel Sail continues to evolve with:
- **Enhanced Performance**: Better file system performance across platforms
- **More Services**: Additional pre-configured services
- **Improved Developer Experience**: Better debugging and monitoring tools
- **Cloud Integration**: Easier deployment to cloud platforms
- **ARM Support**: Better support for Apple Silicon and ARM processors
Conclusion
Laravel Sail has revolutionized Laravel development by making Docker accessible to developers of all skill levels. It provides a consistent, reliable development environment that eliminates configuration headaches and "works on my machine" problems.
Key Takeaways
- **Consistency**: Same environment for everyone
- **Simplicity**: Docker power without Docker complexity
- **Flexibility**: Easily customizable for any project needs
- **Productivity**: Focus on building features, not configuring environments
- **Scalability**: From single developer to large teams
Getting Started Today
- **New Project**: Use `curl -s "https://laravel.build/project-name" | bash`
- **Existing Project**: Add Sail with `composer require laravel/sail --dev`
- **Learn by Doing**: Start with basic commands and gradually explore advanced features
- **Join the Community**: Engage with the Laravel community for tips and best practices
Laravel Sail isn't just a tool—it's a philosophy of making development more enjoyable and productive. Whether you're building your first Laravel application or your hundredth, Sail provides the foundation you need to succeed.
Ready to set sail? Your next Laravel adventure awaits! ⛵