- 2025-05-16
- posted by Htay Min Kaung
- System
How to replace colors in an image using JavaScript ?
Hi,
Good day. Today, I would like to share how to replace colors in an image using JavaScript. In JavaScript, you can retrieve color codes from an image and replace them with custom colors programmatically.
As the first step, let’s include the following code within the <head> tag to link the Bootstrap CSS framework, which will help enhance the user interface design.
Color Replacer
After linking the Bootstrap CSS framework, we can now design the user interface using Bootstrap classes. Since our primary focus is on JavaScript functionality, add the following code snippets within the <body> tag.
Image Color Replacer
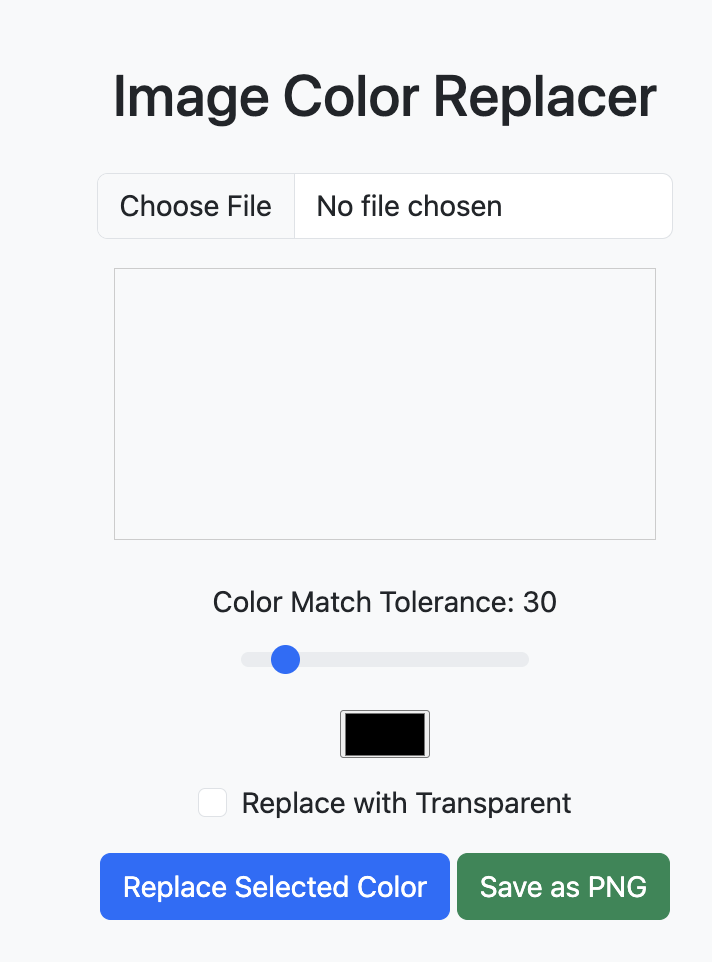
Once the code is added to the <body> tag, the user interface will appear as shown in the image below.

Next, let’s define variables to simplify event handling and enable easier control of DOM elements.
let selectedColor = null;

const upload = document.getElementById('upload');
const canvas = document.getElementById('canvas');
const changeBtn = document.getElementById('change');
const ctx = canvas.getContext('2d');
const colorPicker = document.getElementById('color-picker');

const toleranceInput = document.getElementById('tolerance');
const toleranceValue = document.getElementById('tolerance-value');

const makeTransparent = document.getElementById('makeTransparent');

const saveBtn = document.getElementById('save');
With the above code in place, it is now easier to control and handle DOM events effectively.
saveBtn.addEventListener('click', () => {
  const link = document.createElement('a');
  link.download = 'modified-image.png';
  link.href = canvas.toDataURL('image/png');
  link.click();
});

toleranceInput.addEventListener('input', () => {
  toleranceValue.textContent = toleranceInput.value;
});

upload.addEventListener('change', (e) => {
  const file = e.target.files[0];
  const img = new Image();
  img.onload = () => {
    canvas.width = img.width;
    canvas.height = img.height;
    ctx.drawImage(img, 0, 0);
  };
  img.src = URL.createObjectURL(file);
});


canvas.addEventListener('click', (e) => {
  const rect = canvas.getBoundingClientRect();
  const scaleX = canvas.width / rect.width;
  const scaleY = canvas.height / rect.height;

  const x = Math.floor((e.clientX - rect.left) * scaleX);
  const y = Math.floor((e.clientY - rect.top) * scaleY);
  const data = ctx.getImageData(0, 0, canvas.width, canvas.height).data;
  const idx = (y * canvas.width + x) * 4;
  selectedColor = [data[idx], data[idx + 1], data[idx + 2], data[idx + 3]];
  colorPicker.value = rgbToHex(...selectedColor);
  colorPicker.click();
});

changeBtn.addEventListener('click', () => {
  if (!selectedColor) return;
  const [r1, g1, b1, a1] = selectedColor;
  const newColor = hexToRgb(colorPicker.value);
  const tolerance = parseInt(toleranceInput.value, 10);

  const imgData = ctx.getImageData(0, 0, canvas.width, canvas.height);
  const d = imgData.data;

  for (let i = 0; i < d.length; i += 4) {
    const dist = colorDistance(d[i], d[i + 1], d[i + 2], r1, g1, b1);
    if (dist <= tolerance) {
      if (makeTransparent.checked) {
        d[i + 3] = 0; // Transparent
      } else {
        d[i] = newColor.r;
        d[i + 1] = newColor.g;
        d[i + 2] = newColor.b;
      }
    }
  }

  ctx.putImageData(imgData, 0, 0);
});
To convert and replace colors in the image, utility functions need to be implemented. These include functions for converting RGB to HEX and vice versa, as well as a colorDistance function to detect colors within the same group, allowing for a configurable tolerance range when matching similar colors.
function colorDistance(r1, g1, b1, r2, g2, b2) {
  return Math.sqrt(
    (r1 - r2) ** 2 +
    (g1 - g2) ** 2 +
    (b1 - b2) ** 2
  );
}

function rgbToHex(r, g, b) {
  return "#" + [r, g, b].map(x => x.toString(16).padStart(2, '0')).join('');
}

function hexToRgb(hex) {
  const bigint = parseInt(hex.slice(1), 16);
  return {
    r: (bigint >> 16) & 255,
    g: (bigint >> 8) & 255,
    b: bigint & 255
  };
}
Now, by running the code within a single HTML file, we can seamlessly replace one color with another in the image. Thanks to the added tolerance feature, the application can process a range of similar colors, allowing replacement with both custom colors and transparency. I hope this guide has provided you with a clear understanding of how to build a color replacement tool in JavaScript.

In conclusion, we’ve explored how to build a simple yet effective image color replacement tool using JavaScript. By leveraging DOM manipulation, canvas rendering, and color conversion logic with tolerance control, you can create interactive applications that dynamically modify image colors. This approach can be extended further for more advanced image editing features. Thank you for following along—I hope this guide has been informative and inspires further experimentation with JavaScript and image processing.


